








What Is Cilium Cluster Mesh?
Cilium Cluster Mesh extends the multi-cluster Kubernetes deployment capabilities of Cilium, an open source Container Network Interface (CNI) solution. It enables secure networking between pods across multiple Kubernetes clusters. Cilium Cluster Mesh provides a transparent layer that manages, scales, and secures inter-cluster communications without requiring network overlays or VPNs.
This technology allows organizations to operate multi-cluster Kubernetes environments as if they were a single cluster, simplifying network policies, service discovery, and load balancing across clusters.
This is part of a series of articles about Cilium vs Calico.
In this article:
- Key Features of Cilium Cluster Mesh
- Cilium Cluster Mesh Limitations
- Quick Tutorial: Setting Up a Cilium Cluster Mesh
Key Features of Cilium Cluster Mesh
1. Connectivity Between Multiple Kubernetes Clusters
Cilium Cluster Mesh provides connectivity between multiple Kubernetes clusters. This is achieved without the need for VPN setups or routing configurations, thanks to its use of eBPF technology. Services running in different clusters can discover and communicate with each other as if they were in the same cluster.
This connectivity simplifies the architecture and enhances the developer experience. Developers can deploy applications across clusters without worrying about the underlying networking complexities. This cross-cluster connectivity also allows organizations to leverage multiple cloud providers or hybrid cloud environments.
2. High Availability and Fault Tolerance
By enabling services in different clusters to back each other up, Cilium Cluster Mesh provides a mechanism for failover and redundancy. In the event of a failure in one cluster, traffic can be automatically rerouted to another cluster where the service is operational, minimizing downtime and ensuring continuous service availability.
Cilium Service Mesh’s distributed nature, together with its routing and load balancing capabilities, ensure that applications remain available in the face of individual cluster failures, network partitions, or other infrastructure outages, which is a core benefit of the Cilium service mesh.
Learn more in our detailed guide to Cilium service mesh.
3. Transparent Service Discovery
Cilium Cluster Mesh allows services deployed in different Kubernetes clusters to discover each other automatically, without requiring any additional service discovery mechanisms. Cilium integrates with Kubernetes’ native service discovery features, ensuring that services can locate each other using their standard DNS names.
This feature simplifies the configuration and operation of multi-cluster environments, as it removes the need for manual intervention in service discovery processes. Developers can deploy services across clusters and allow them to communicate without any additional setup.
4. Shared Services Across Clusters
Cilium Cluster Mesh enables the sharing of services across multiple Kubernetes clusters, allowing a service deployed in one cluster to be consumed by applications in other clusters. This is useful for organizations that want to centralize certain services, such as authentication, logging, or monitoring, and make them available across their entire Kubernetes environments.
By facilitating the sharing of services, Cilium Cluster Mesh helps organizations optimize their resources and avoid duplicating services in each cluster. This reduces overhead and cost and ensures that shared services can be managed and updated centrally.
Cilium Cluster Mesh Limitations
While Cilium Cluster Mesh offers numerous advantages, it also comes with certain limitations.
As applications scale across multiple clusters, maintaining consistent policy enforcement, workload isolation, and secure communication becomes increasingly complex. These challenges highlight the importance of strong foundational controls for Kubernetes environments operating at scale.
Learn more in our detailed guide to container security.
Architecture and Technology Limitations
The Cilium service mesh is reliant on the underlying network infrastructure’s capabilities. In environments where network policies or configurations are restrictive, achieving the desired level of connectivity and performance can be challenging. Additionally, the use of BPF technology may require specific kernel versions or configurations, limiting its applicability in certain environments or legacy systems.
Cluster Mesh Capacity
The capacity of Cilium Cluster Mesh, particularly in terms of the number of clusters it can effectively manage and the volume of cross-cluster traffic it can handle, can be a limitation for some deployments. As the number of clusters increases, the complexity of the mesh and the overhead associated with managing inter-cluster communications also grow.
Scalability and Identity Limitations
As applications scale across multiple clusters, maintaining a consistent identity and policy enforcement model becomes increasingly complex. The mesh must ensure that security policies are uniformly applied and that service identities are preserved and recognized across cluster boundaries. This requires a robust identity management system that can operate at scale.
Quick Tutorial: Setting Up a Cilium Cluster Mesh
Here’s a quick guide to establishing a Cluster Mesh using Cilium.
Prerequisites
Before setting up a cluster, it is important to ensure the following:
- Install Cilium on all clusters.
- All clusters must be configured with the same datapath mode (Encapsulation or Native-Routing).

- PodCIDR ranges and nodes in all clusters must have unique, non-conflicting IP addresses.

- Nodes across clusters require IP connectivity, typically through VPN tunnels or network peering.
- The network must permit inter-cluster communication, adhering to specified firewall rules.
Step 1: Install Cilium CLI
Ensure you have cilium-cli v0.15.0 or later on your local machine. You can install or update the Cilium CLI with the following Linux commands:
CILIUM_CLI_VERSION=$(curl -s https://raw.githubusercontent.com/cilium/cilium-cli/main/stable.txt)
CLI_ARCH=amd64
if [ "$(uname -m)" = "aarch64" ]; then CLI_ARCH=arm64; fi
curl -L --fail --remote-name-all https://github.com/cilium/cilium-cli/releases/download/${CILIUM_CLI_VERSION}/cilium-linux-${CLI_ARCH}.tar.gz{,.sha256sum}
sha256sum --check cilium-linux-${CLI_ARCH}.tar.gz.sha256sum
sudo tar xzvfC cilium-linux-${CLI_ARCH}.tar.gz /usr/local/bin
rm cilium-linux-${CLI_ARCH}.tar.gz{,.sha256sum}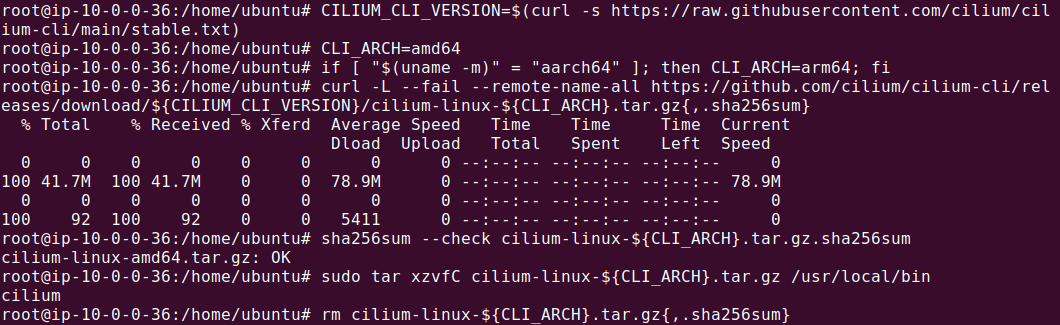
Step 2: Prepare the Clusters
Assign each cluster a unique name and numeric ID (1-255) using the following options during Cilium installation:
- ConfigMap options: cluster-name and cluster-id
- Helm options: cluster.name and cluster.id
- Cilium CLI: –set cluster.name and –set cluster.id


For shared CA (Certificate Authority) for Hubble Relay, copy the CA secret from one cluster to another using these commands:
kubectl --context=$CLUSTER1 get secret -n kube-system cilium-ca -o yaml |
kubectl --context $CLUSTER2 create -f -
Step 3: Enable Cluster Mesh
Enable Cluster Mesh on each cluster with:
cilium clustermesh enable --context $CLUSTER1 --service-type ClusterIP
cilium clustermesh enable --context $CLUSTER2 --service-type ClusterIP
Note: It is assumed that two environment variables, CLUSTER1 and CLUSTER2, were set via the command line.

This command deploys the clustermesh-apiserver and prepares all necessary certificates.
Step 4: Connect the Clusters
Connect the clusters from one end. This action is bidirectional:
cilium clustermesh connect --context $CLUSTER1 --destination-context $CLUSTER2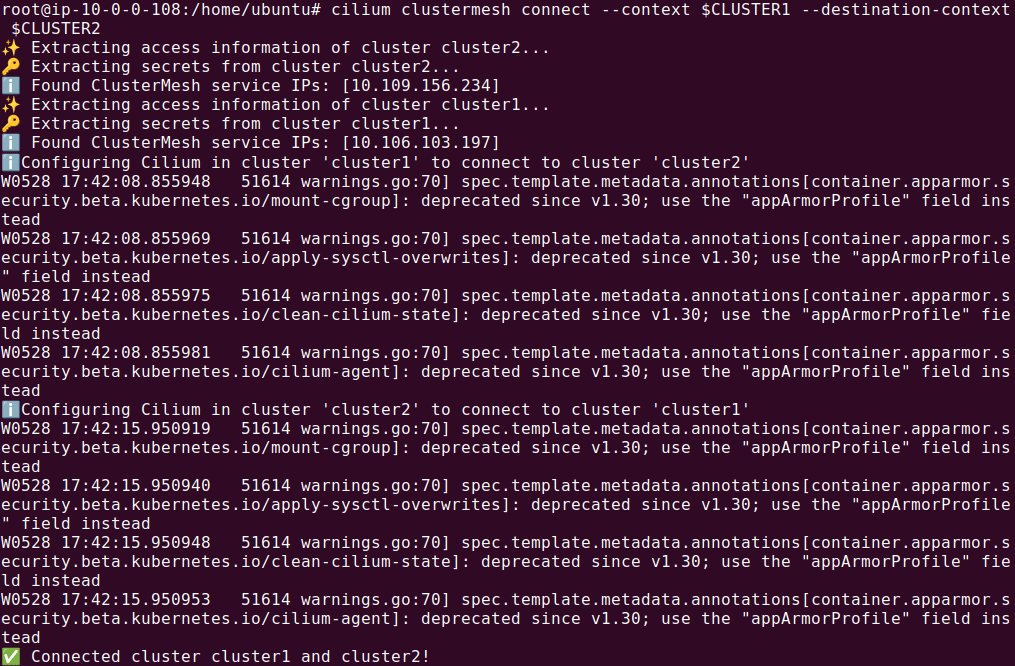
Wait for the connection to establish with:
cilium clustermesh status --context $CLUSTER1 --wait
Step 5: Test Pod Connectivity
Finally, confirm the setup by testing pod connectivity between clusters:
cilium connectivity test --context $CLUSTER1 --multi-cluster $CLUSTER2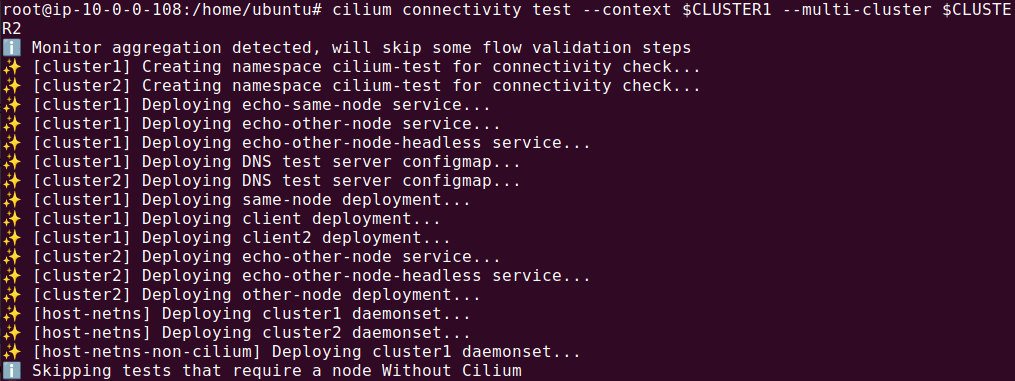
That’s it—you now have a Cilium Cluster Mesh connecting two Kubernetes clusters together.
Streamline Cluster Mesh operations with Calico Cloud
Simplify cluster mesh operations with complete visibility, security, and networking through a centralized management plane.
- Dynamic Service and Threat Graph – Kubernetes-native visualization of all collected data that allows the user to visualize communication flows across services and team spaces, to facilitate troubleshooting.
- Operational simplicity with Envoy integrated into the data plane – Calico provides observability, traffic flow management, and control by deploying a single instance of Envoy as a daemon set on each node of your cluster, instead of a sidecar approach, thus making it more resource efficient and cost effective.
- Zero-trust workload access controls – Integrate with firewalls or other kinds of controls where you might want to understand the origin of egress traffic. Identify the origin of egress traffic, to the point where you have visibility into the specific application or namespace from which egress traffic seen outside the cluster came.
- Encryption for data in transit – Calico leverages the latest in crypto technology, using open-source WireGuard. As a result, Calico’s encryption is highly performant while still allowing visibility into all traffic flows.
Next steps: